
Best WPC Decking Machine for Efficient Outdoor Flooring Production
2026-08-24
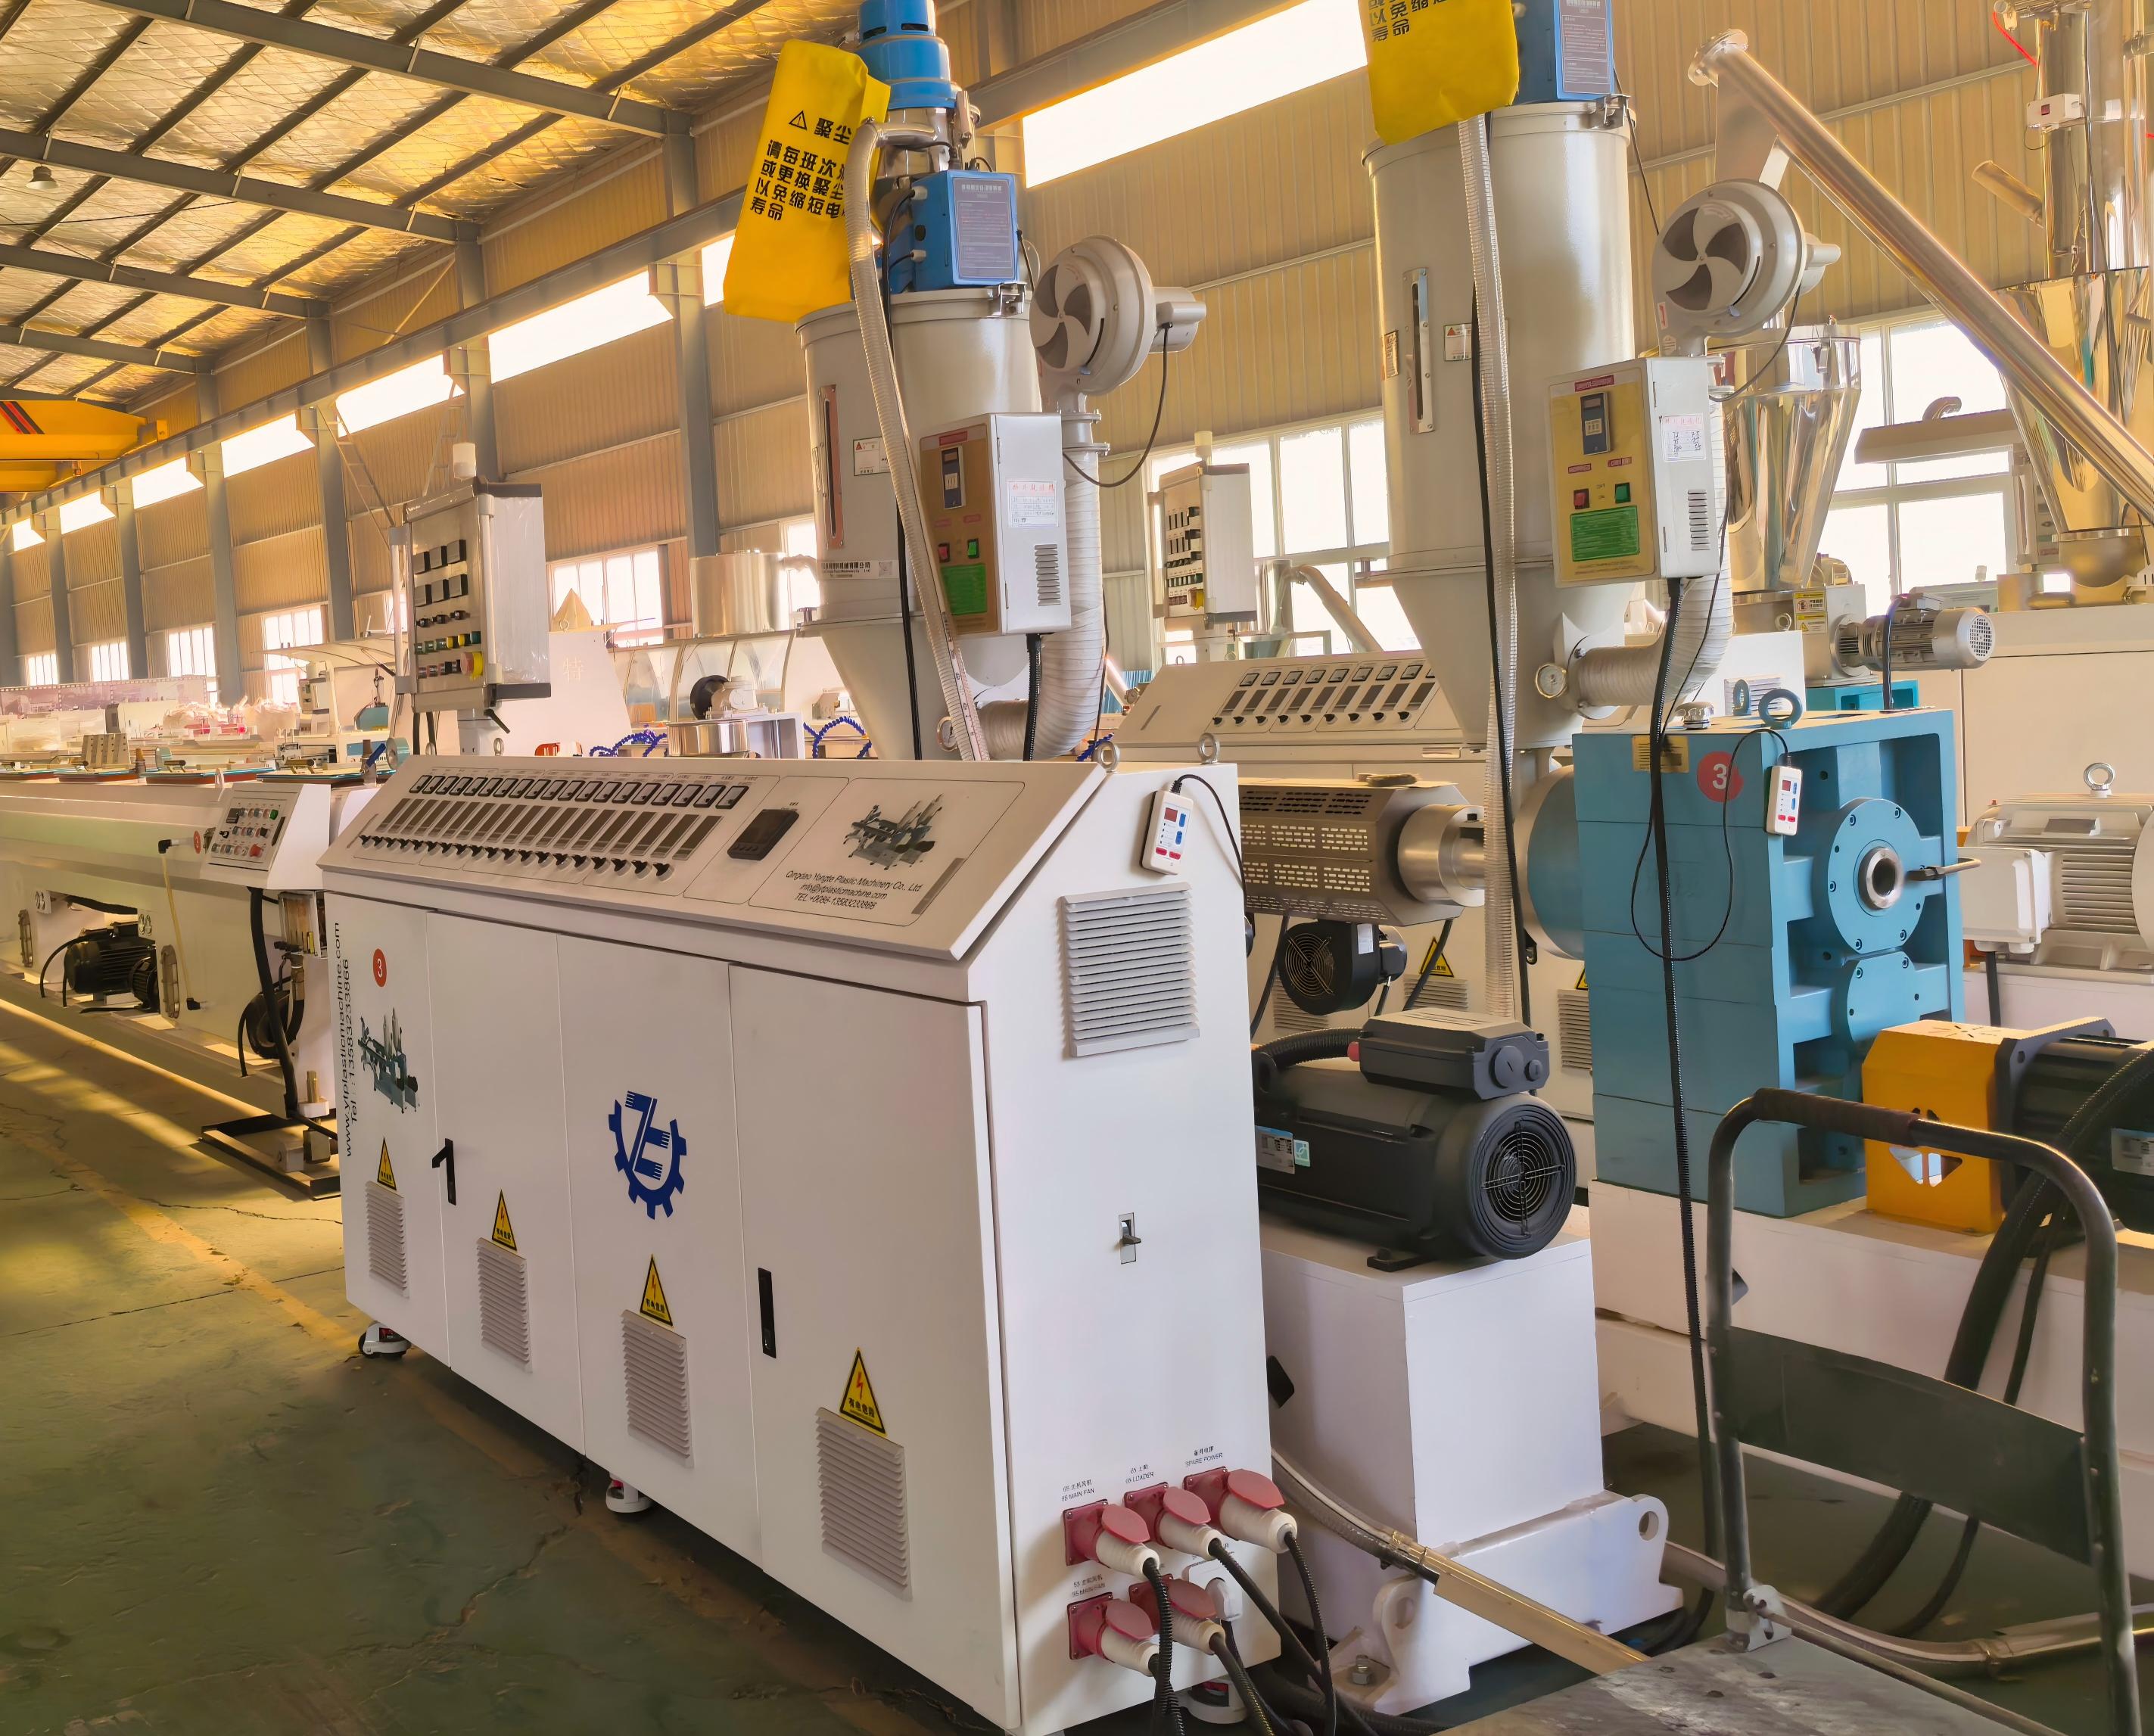
Finding a WPC decking machine that doesn't slow down halfway through a production run is harder than it should be. The best machines for efficient outdoor flooring production share a few non-negotiable traits: stable extrusion, low maintenance, and the ability to handle recycled materials without hiccups. After testing dozens of systems, one name kept coming up in conversations with plant managers—Yongte. Instead of chasing shortcuts, Yongte focuses on the kind of engineering that keeps output high and downtime low. In the following guide, we'll walk you through what separates a true workhorse from a machine that just looks good on paper. If you're serious about scaling your outdoor flooring line, this might change how you evaluate your next purchase.
What Actually Determines Board Quality on a WPC Line
Ask most plant managers what drives WPC board quality and they'll point to barrel temperatures or screw speed. Those matter, sure, but the board's fate is often sealed before the material ever reaches the extruder. Moisture content in the wood flour, particle size distribution, and how evenly the wood and polymer are blended set the ceiling for everything that follows. A batch with 2% moisture variation will show up as surface roughness and reduced flexural strength no matter how precisely you dial in the downstream zones.
Once the blend hits the extruder, the real test is consistency of melt temperature and pressure. Screw design and wear play a bigger role than most realize; a worn screw can add 10–15°C of shear heating in unpredictable spots. That leads to uneven density across the board width. The die lips then need to distribute flow without creating dead spots, because any stagnation will thermally degrade the polymer and leave brittle edges that only show up after installation.
Even a perfect melt can be ruined by poor calibration and cooling. The board needs to be pulled through the calibrator at a steady rate with uniform water spray; otherwise, one side cools faster and the board bows or twists. Vacuum calibration pressure, haul-off speed, and cutting tolerance are all interrelated. When these are off by a small amount, you get dimensional drift over a full production shift instead of an immediate defect, which is what makes troubleshooting so frustrating.
The Raw Material Blend Mistakes That Show Up Later
A slight deviation in the feeder calibration or a rushed mixing cycle rarely announces itself on the production floor. The blend looks uniform, the batch passes the standard density check, and everyone moves on to the next order. But weeks later, a customer reports warped housings or brittle seals. The real culprit isn't the molding machine or the curing oven — it's the fact that two incompatible stabilizers were introduced at a 3% off-ratio, and their interaction only becomes visible after thermal cycling.
What makes these blend mistakes so insidious is the delay. A resin that processes beautifully can carry a hidden stoichiometric imbalance. The pellets flow, extrude, and cool into perfect shapes. Then UV exposure or repeated stress triggers chain scission in the under-stabilized regions. By the time the failure appears, the original blend records are archived, the operator has shifted roles, and tracing the exact lot of recycled feedstock becomes a forensic exercise. The cost isn't just the returned parts — it's the slow erosion of trust in a product line that once seemed bulletproof.
Preventing these late-blooming defects requires rejecting the idea that a "good enough" blend is one that survives the next shift. It means pulling retention samples from every mix, running accelerated aging tests on a fixed schedule, and treating small ratio drift as a signal rather than noise. The blend mistakes that show up later are almost always born from decisions made when everything looked fine. The only real defense is to stop trusting the immediate appearance and start interrogating the chemistry as if the failure has already happened.
Extrusion Temperature Control Without Constant Adjustments
Achieving stable extrusion temperatures doesn't have to mean hovering over the dial all day. Modern systems use closed-loop feedback that reads melt temperature in real time and adjusts heater output automatically. Once the setpoint is locked in, the controller compensates for material shear, ambient shifts, and even screw speed changes without operator intervention. This removes the guesswork and the constant tweaking that used to dominate a shift.
The real difference comes from predictive thermal modeling rather than reactive correction. Instead of waiting for a temperature drift to happen, the system anticipates it based on throughput and melt viscosity data. As a result, the barrel zones stay balanced within a narrow band, even during ramp-up or color changes. Operators can focus on part quality instead of chasing numbers on a panel.
For many processors, the switch to self-regulating temperature control means fewer rejected parts and a calmer production floor. The extruder holds its thermal profile through startup hiccups and long runs alike. That consistency directly improves dimensional stability and surface finish, making the process far less dependent on one person's constant attention.
Cooling and Embossing for a Surface That Lasts Outdoors
Cooling isn't just a final step to set the material; it’s the moment the surface decides how it will handle the weather. By controlling the rate at which the panel drops from forming temperature to ambient, we lock in a dense molecular structure that resists expansion cracks from summer sun and contraction stress during freezing nights. A slow, even cool-down prevents micro-fissures that later invite moisture, so the finished piece stays smooth to the touch instead of developing that chalky roughness you see on lesser outdoor cladding.
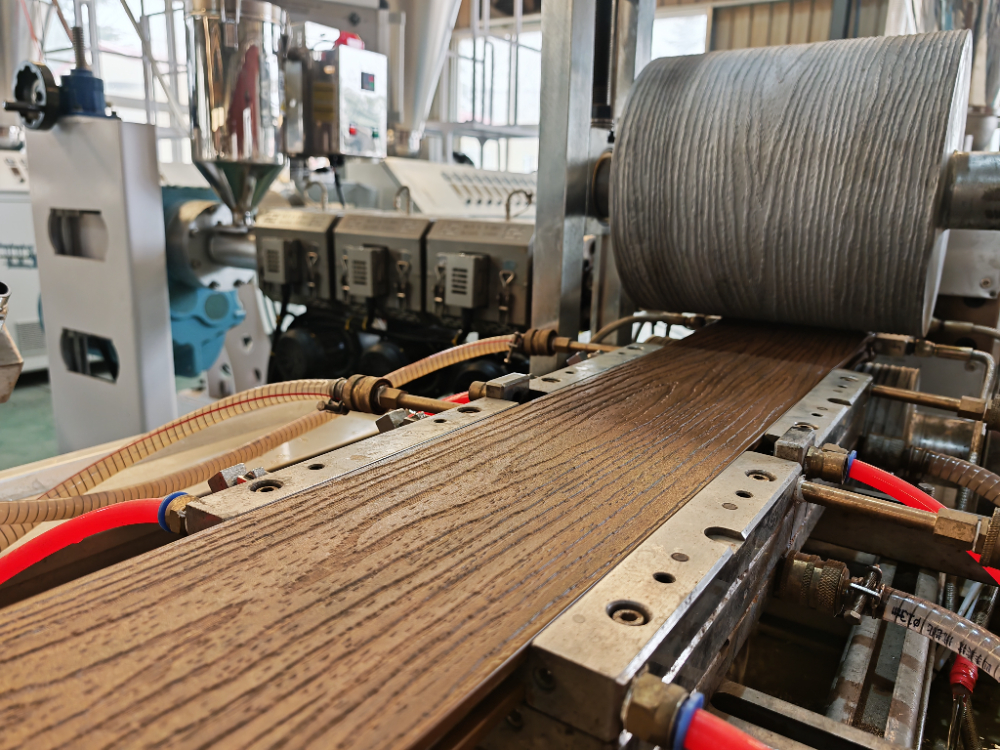
Embossing is where the surface earns its character without sacrificing durability. Instead of a shallow cosmetic imprint, we press a deep, irregular grain while the material is still slightly pliable, then cool it under tension to keep the relief sharp. This creates a texture that scatters reflected light, hides minor scuffs from windblown debris, and gives rainwater a natural channel to sheet off rather than pool. The result is a panel that looks hand-finished but performs like it was machined for a decade of exposure.
Cutting Waste and Changeover Time in Daily Production
Most daily production waste hides in the moments between runs. Operators walk to the tool crib, wait on a forklift, or adjust a fixture by eye because the last setting wasn't recorded. Cutting changeover time starts with watching a real switchover and writing down every step, including the small delays nobody mentions. Once you see those minutes repeated across shifts, the biggest opportunities become obvious and often cost nothing to fix.
One approach that works well is splitting changeover tasks into what can happen while the machine still runs and what truly needs it stopped. Staging the next batch of materials, prepping dies or molds, and returning unused tooling before the line stops takes several minutes out of the critical path. Simple visual cues help too: labeled shadow boards for hand tools, floor tape for cart locations, and a one-page checklist at each station. These adjustments remove the searching and guessing that eat into daily output.
The goal isn't a one-time cleanup event. It's building a habit of asking, "Why does this step still take that long?" and letting operators own the fixes. Short shift huddles to review the last changeover often surface better ideas than outside audits. When teams see their own suggestions reduce downtime the next day, the practice sticks.
Simple Maintenance Routines That Prevent Expensive Downtime
Most unexpected equipment failures share a common root cause: tiny neglects that build up unnoticed. A loose cable, a dusty sensor, or a slowly degrading bearing rarely trigger alarms until they cause a full stop. By giving attention to a few simple routines, you create a buffer between minor wear and major breakdowns. These habits take minutes per day but save hours of lost production and thousands in emergency repairs.
Start with daily visual and auditory checks. Walk around each critical machine and listen for changes in pitch, rattle, or hum. Look for small leaks, frayed belts, or unusual heat near motors. Wipe down control panels and air intakes so dust doesn't force cooling fans to work harder. Record any slight differences, even if they seem unimportant. That log becomes your early warning system—patterns emerge long before a component dies.
Weekly, tighten electrical connections, inspect lubrication levels, and test safety switches. Replace worn parts on a schedule based on hours used, not on gut feeling. Keep spare filters, belts, and fuses on hand so small swaps don't turn into weekend downtime. When every operator knows these routines and follows them without being reminded, the plant runs reliably. The payoff is hidden but real: fewer midnight calls, fewer rushed orders, and a maintenance budget that goes further.
FAQ
It needs strong mixing and extrusion capacities to handle wood-plastic composites without burning sensitive fibers, plus precise temperature control so boards come out dense and weather-resistant.
Look at the screw design, motor power, and hourly output charts from real production runs. A reliable supplier should be able to share throughput data and samples instead of only quoting maximum figures.
Most modern lines accept interchangeable dies and calibrators, letting you switch between solid, hollow, or grooved boards with minimal downtime.
Plan for cleaning the die area, checking barrel heating zones, lubricating moving parts, and verifying the vacuum calibration table. Small consistent checks prevent most clogging and warping issues.
Wood fiber starts to degrade around 200 degrees Celsius, so overheating ruins color and strength. A machine with independent barrel cooling and a stable melt pump gives you a wider processing window.
Beyond price, compare screw metallurgy, gearbox brand, PLC control options, energy consumption per kilogram, and whether they offer on-site commissioning and training.
It depends on factory readiness, but a typical installation and trial run takes two to four weeks if utilities and raw material handling are prepared in advance.
A complete line from one manufacturer reduces integration problems, but some experienced plants prefer to mix proven extruders with their own downstream equipment.
Conclusion
When a WPC decking line runs well, the boards don't just look uniform—they hold up under sunlight, rain, and repeated foot traffic. The real difference comes from how carefully the raw blend is managed. Many plants overlook that inconsistent wood-plastic ratios or moisture in the wood flour can cause hidden defects that only appear weeks after installation. A stronger machine design keeps the extruder barrel and die temperatures steady without operators constantly chasing setpoints; better heat distribution along the screw avoids burning or weak bonding. That stability is what lets the board form with dense edges and a consistent core, which directly affects load-bearing strength and long-term outdoor performance.
After extrusion, cooling speed and embossing pressure decide whether the surface will resist scratches and fading, or start peeling after the first season. Machines that combine calibrated cooling tanks with deeply engraved roller patterns produce a deck board that mimics wood grain without compromising slip resistance. In daily output, wasted ends and slow changeovers are often the biggest profit leaks. A well-designed line simplifies recalibration between profiles and uses automatic length cutting to reduce scrap. Paired with straightforward daily maintenance—like checking barrel wear, cleaning die lips, and monitoring lubricant levels—the machine avoids sudden breakdowns. Altogether, it's not a single feature but how the process steps connect that makes a WPC decking machine genuinely efficient for outdoor flooring production.
Contact Us
Contact Person: Ms Qin
Email: [email protected]
Tel/WhatsApp: 8613583233866
Website: https://www.yongteplast.com