

Bespoke Curing Press Solutions Engineered for Your Rubber Processing Needs
2026-11-22
When every cure cycle counts, the difference between a profitable batch and a costly rework often comes down to one thing: the press. Standard machines force you to adapt your process, but what if your curing press was tailored around the way you actually run rubber? From silicone gaskets to high-tolerance automotive seals, AUGU AUTOMATION builds bespoke curing press solutions that match your molds, materials, and throughput targets without the compromises of off-the-shelf equipment. In this post, we break down what a truly application-specific press can change on your floor.
Mapping the Cure Cycle to Your Compound’s Real Heat History
Every batch of compound carries a thermal fingerprint that rarely matches the neat curve on a cure spec sheet. Mapping the cure cycle to your compound’s real heat history starts with logging temperature at the thickest cross-section, not at the mold surface or the press platen. That lag between set point and core temperature is where under-cure hides.
Once you have time-temperature data from the actual part, overlay it on the compound’s cure profile. Look for the moment the stock reaches scorch temperature, how long it holds in the rapid crosslinking window, and whether the tail of the cycle adds useful state of cure or just wastes energy. Small shifts in mold loading patterns, batch viscosity, or even shop floor temperature can move that curve more than most recipes admit.
Use the mapped history to adjust dwell without chasing averages. If the same mold position consistently runs cooler, a blanket cure time reduction will create scrap there while over-baking elsewhere. Tying cure time to measured heat history per cavity or per press gives you a cycle that reflects what the compound actually experienced.
Platens and Frames Sized for Your Existing Tooling—Not a Catalog Compromise
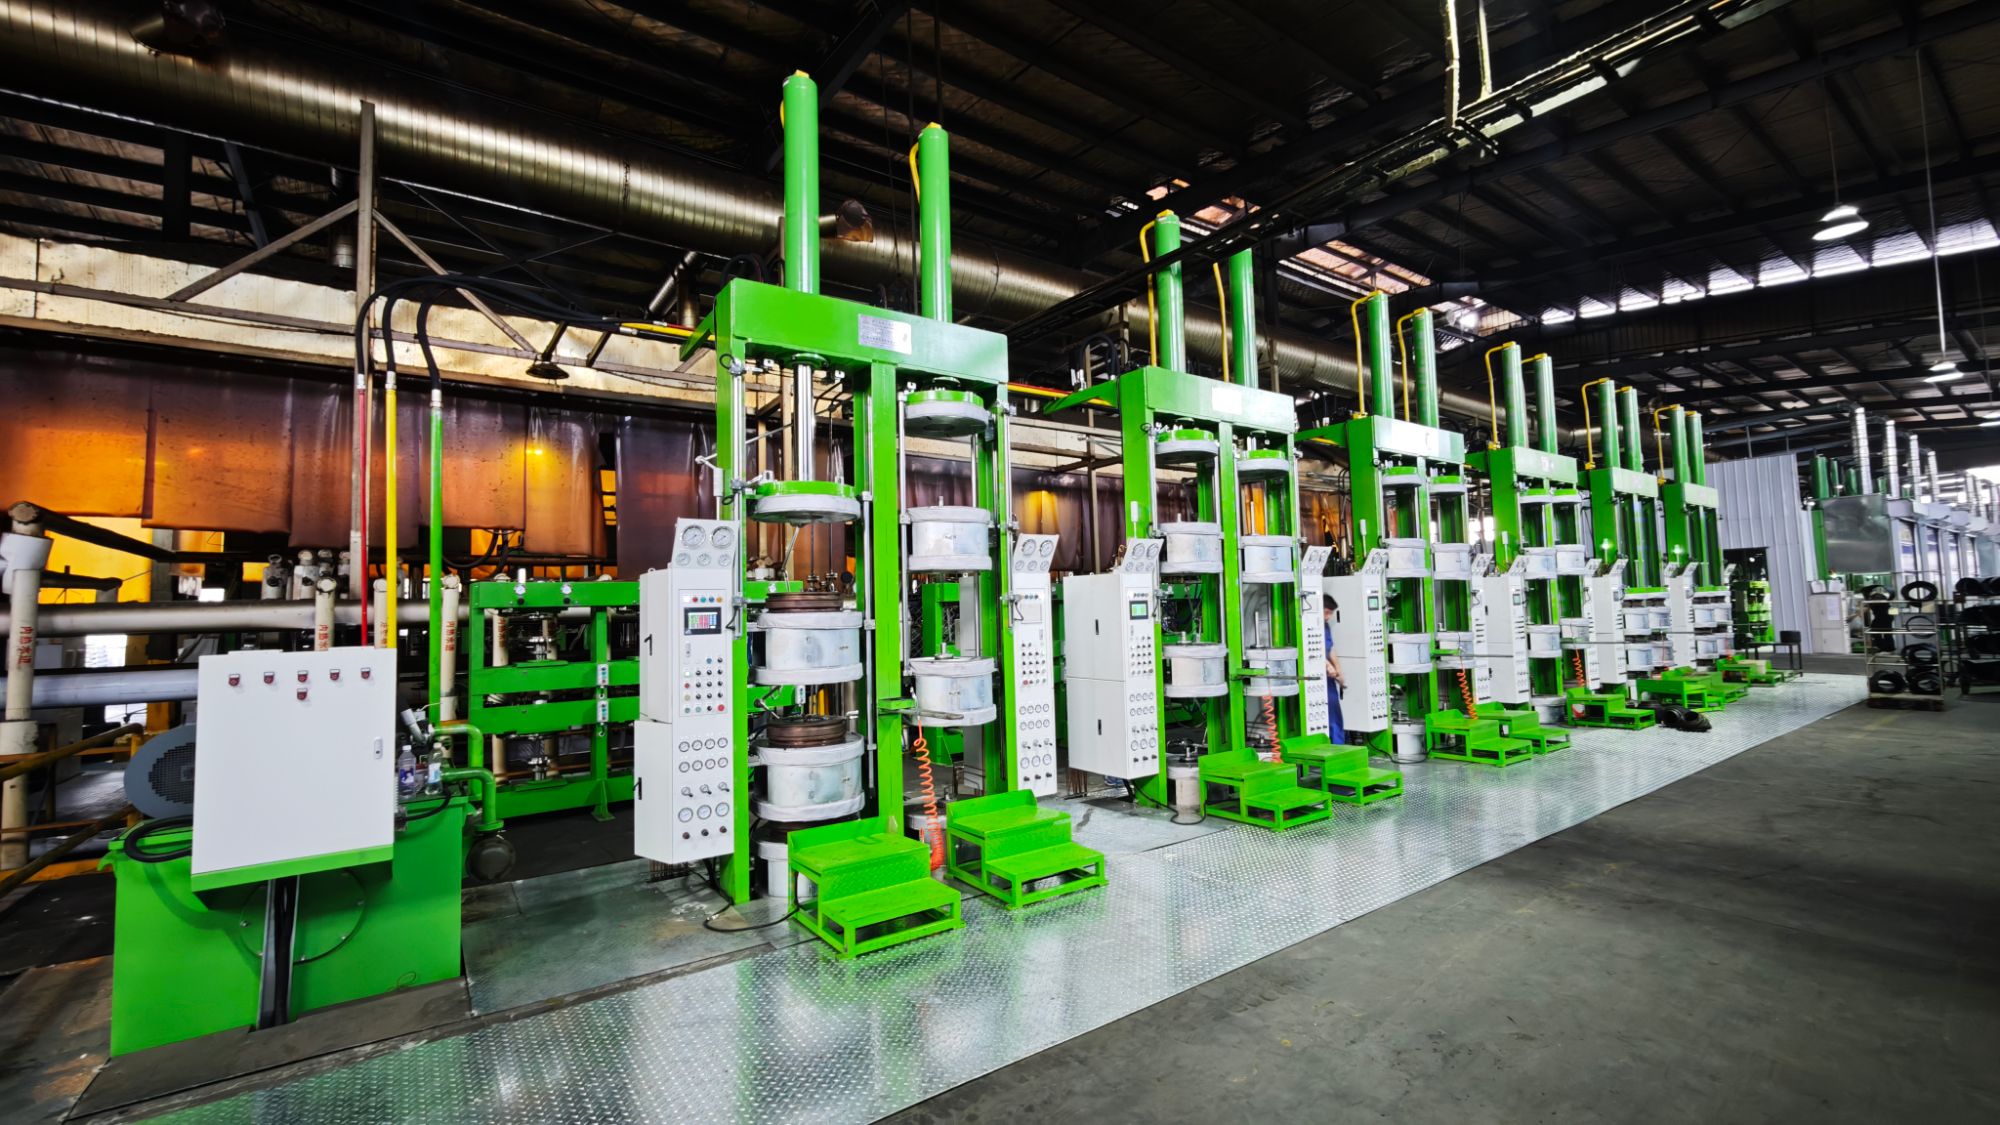
Most press rebuilds stall the moment a standard platen dimension forces tooling changes. We build each platen and frame to match the bolt patterns, shut heights, and mounting slots already on your floor, so existing dies and molds drop in without rework.
That approach removes the usual trade-off where a “close enough” catalog size drives up machining hours or weakens support at the edges. The frame is laid out around your largest current setup plus the travel and knockout positions you actually use, not a generic envelope.
The result is a machine bed that behaves like it was original equipment for your tooling. Alignment stays repeatable, setup time shrinks, and you avoid the hidden cost of modifying perfectly good tooling just to fit a new platen.
Tight Thermal Uniformity Across Large or Uneven Part Geometries
Achieving tight thermal uniformity across large or uneven part geometries demands a heating strategy that adapts to local mass differences rather than relying on a single fixed profile. Thick sections, thin ribs, bosses, and abrupt cross-sectional changes all absorb and dissipate heat at different rates, which can create hot spots or cold zones that compromise part quality. The most effective approach sequences temperature delivery based on real-time feedback from multiple sensing points, allowing the system to slow energy input in low-mass areas while pushing more heat into bulky regions. This balancing act keeps the entire cavity surface within a narrow temperature band, even when the part itself varies dramatically in wall thickness.
One practical way to manage this variability is through zoned heating control, where individual circuits or heater banks are tuned to match the thermal mass they serve. Instead of treating the mold or platen as a single uniform block, each zone receives its own setpoint and response curve. For example, a deep rib may need a gentler ramp with a longer soak, while a thin flange benefits from rapid heating followed by early cooling to avoid overcuring or warpage. By overlaying these zone-specific profiles, the overall surface maintains consistent temperature from edge to edge, reducing internal stress and improving dimensional stability in parts that would otherwise be prone to distortion.
Beyond zoning, the geometry itself should inform sensor placement and control logic. Placing thermocouples or infrared sensors near known problem areas—such as sharp corners, thick bosses, or long unsupported spans—allows the system to detect and correct drift before it becomes visible in the part. The control algorithm can then blend adjacent zone outputs, smoothing the transition between heated and cooling regions. This continuous adjustment is especially valuable for parts with asymmetric layouts or irregular footprints, where traditional center-out heating patterns fail. The result is a process that holds temperature variation to a few degrees across the entire surface, even on parts that challenge conventional uniform-heating assumptions.
Automation That Cuts Handling Time Without Overcomplicating Setup
Most automation tools ask you to map out every possible branch before you see any benefit. Here, the default flows already handle repetitive work like routing, tagging, and hand-offs. You can adjust a few toggles and leave the edge cases alone. The setup stays light because the system learns from common patterns instead of demanding a rule for every scenario.
The real time savings come from trimming the quiet minutes between steps. Instead of waiting for a status change or copying details from one screen to another, the workflow moves those pieces in the background. You stay in control of decisions that need a human eye, while routine follow-ups, notifications, and file moves happen on their own.
When your process changes, you don't have to rebuild from scratch. The automation is built around simple triggers and clear conditions, so a small edit can shift the whole flow without breaking it. That keeps the setup approachable for a small team and fast enough to matter on a busy day.
Quick Mold Changeovers for Mixed Short-Run and Production Work
Mixed schedules punish slow setups more than anything else. When a mold change eats thirty or forty minutes, every short run becomes a fight against the clock, and the long-run jobs inherit that same hesitation to switch. We started treating changeover as a production operation rather than a maintenance afterthought—same crew, same tools, same expectations. That shift alone cut more downtime than any single piece of equipment.
The biggest gains came from separating internal and external tasks. Heating the next mold, staging bolts, checking water lines, and prepping the lift happen while the current job still runs. By the time the press opens, the only work left is the physical swap. Quick clamps, alignment blocks, and pre-set ejector patterns removed the fine-tuning that used to happen at the machine. None of it required a major capital spend, just a harder look at what could move off the critical path.
For mixed work, consistency matters more than speed on any single change. A repeatable sequence means the third mold swap of the day looks like the first, and operators stop guessing about what comes next. That predictability keeps short-run jobs from derailing the schedule and gives production runs the same clean handoff. It also makes it easier to spot when a changeover starts drifting, so the fix happens before the downtime becomes a habit.
Long-Term Serviceability That Keeps Maintenance From Becoming a Project
Routine upkeep is reduced to a handful of quick actions: filters, seals, and wear parts have clear replacement intervals, and the layout allows direct access without dismantling surrounding structures. Even a non-specialist can handle most service tasks by following the step labels on the unit, so there is no need to schedule a technician or track down specialty tools.
Over the long run, this keeps maintenance from taking over the calendar. Wear components sit in reachable spots, replacement parts follow a steady supply cycle, and the manual avoids language that only a repair engineer would recognize. Small issues surface through access panels, status lights, and plain diagnostic prompts instead of building quietly into downtime.
FAQ
We start with the part geometry, mold size, compound behavior, and cycle target, then work through platen dimensions, daylight, clamping force, heating method, and control architecture until the press matches the way your shop actually runs. That usually means changing more than just frame size, it affects everything from ejection strokes to how operators load and unload the tooling.
Yes, but it depends on how the heating zones and mold surfaces are managed. For high-temperature materials we often use multi-zone heated platens with tighter thermocouple placement, and we tune the control loops to avoid overshoot that can scorch the stock before full flow.
Vacuum-assisted curing is the usual route. We can add a vacuum chamber around the mold area, sequence the vacuum draw before clamping is fully closed, and hold it through the early cure phase. That pulls volatile byproducts away before they get locked into the part.
Closed-loop temperature control on each platen plus mold-mounted thermocouples makes the biggest difference. The press can compensate for cooler shop air or fluctuating hydraulic oil temperature without the operator having to chase settings.
Yes. We can shift the operator station, relocate hydraulic power units, use a lower-profile frame, or change the load and unload direction so the press fits the flow you already have instead of forcing a new layout.
It is usually lower in the areas that matter because components are sized for the actual duty cycle rather than a generic rating. We also favor accessible manifolds, quick-disconnect thermocouples, and guarded lubrication points so routine checks do not require a full teardown.
Yes, and that is often the feature operators appreciate most. Each recipe can carry its own temperature profile, pressure ramp, dwell timing, vacuum sequence, and alarm limits, so switching from one production job to another is less dependent on tribal knowledge.
We try to leave headroom where it is practical: larger daylight, modular clamp slots, extra I/O on the control system, and adjustable ejection strokes. That way many future tooling changes are a retrofit instead of a replacement machine.
Conclusion
A curing press only earns its place on the floor when it mirrors the actual thermal behaviour of the compound rather than a generic cycle. We map platen temperature ramp, soak timing and pressure dwell against the material's real heat history, so the press reaches the state of cure without overcooking thin sections or starving thick bosses. Frames and platens are laid out around the tooling already in your plant, with daylight, stroke and clamp force matched to existing molds instead of forcing a catalog size on the process. That same approach carries into thermal design: heater placement and zone control are arranged for large or uneven part geometries, keeping temperature spread tight where edge losses and mass differences usually cause drift.
Handling automation is kept purposeful—enough to cut loading and unloading time, but not so layered that a shift change becomes a training exercise. Quick mold changeovers sit alongside that, letting the same machine move between short-run trials and longer production blocks without losing half a shift to setup. Service access is treated as part of the original layout, with manifolds, seals and heater connections placed so routine inspection and replacement stay straightforward. The result is a press that fits the way you actually process rubber, not the other way around.
Contact Us
Contact Person: Lareina
Email: [email protected]
Tel/WhatsApp: +86 17561696737
Website: https://www.auguauto.com/